I wanted a terminal that worked more like RStudio: a shell in one pane, searchable history in another, and a file browser I could drive with either mouse or keyboard. It was a fairly naive request—real programmers do not use Terminal this way—and someone promptly told me it was practically impossible. But the advantage of being a beginner is not knowing enough to be afraid, so I started experimenting.
Before this, my mac + zsh setup used Neofetch as a welcome message (MotD). After the changes, I could switch panes with mouse clicks: a normal shell on the left, fuzzy-searchable history at the top right, and a file browser at the bottom right. The file browser can be controlled by mouse or keyboard, and right-clicking copies a file path.
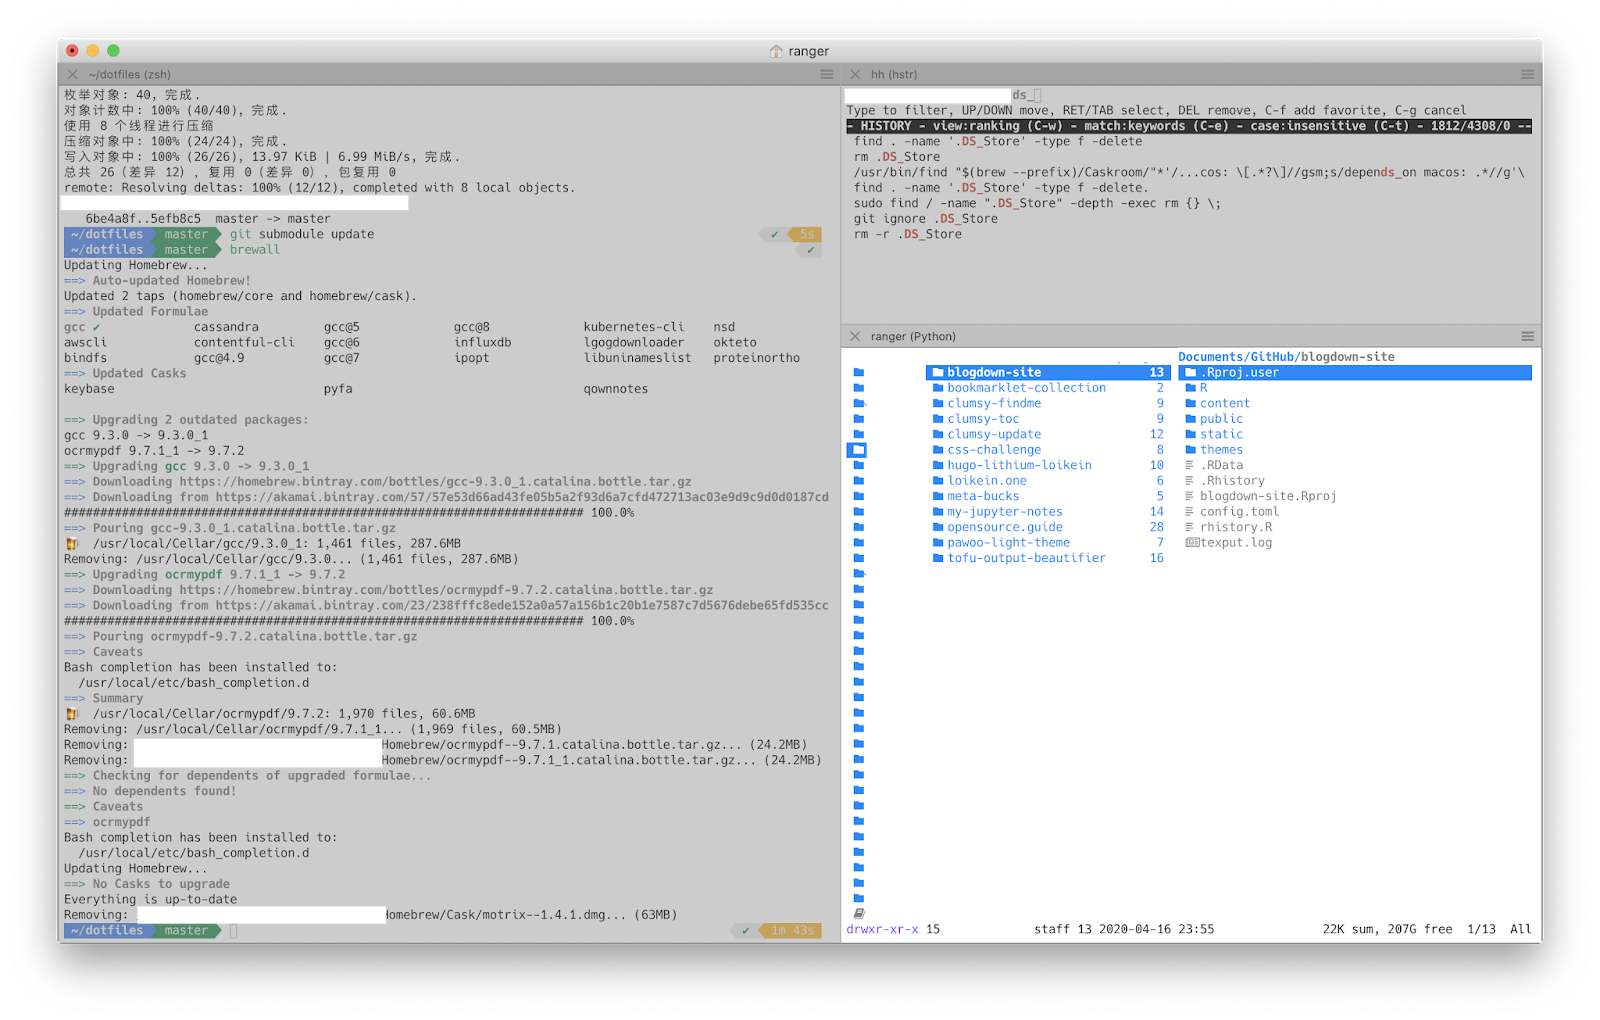
It looked decent enough to pretend I was using RStudio.
The setup at that point was:
- shell: Zsh (the default shell on macOS)
- theme: romkatv/powerlevel10k: A Zsh theme
- color scheme: Google Light, from Gogh - Color Scheme
- terminal: iTerm2
- font: Hack Nerd Font (any Nerd font should work)
- history: dvorka/hstr: bash and zsh shell history suggest box
- file browser: ranger/ranger: A VIM-inspired filemanager for the console
- icons: alexanderjeurissen/ranger_devicons: Ranger plugin that adds file glyphs / icon support to Ranger
If you also use oh-my-zsh, pay attention to submodule settings when installing the theme; I will skip that part here. Nothing else needed much special configuration. In iTerm2, I split vertically once and horizontally once, then ran the relevant commands in each pane. History seems to be shared: after typing a command in the left pane, pressing the up arrow in the top-right or bottom-right pane brings up that command.
A later change: I moved to Alacritty + tmux instead of iTerm, and Antigen instead of OMZ. I never got around to writing that up.