Install Docker
On Ubuntu, the most straightforward way is to install Docker from the apt repository using the official guide:
https://docs.docker.com/engine/install/ubuntu/#install-using-the-repository
You can also install it manually from downloaded packages.
After installation, verify that Docker is working:
sudo docker run --rm hello-world
Working with a Single Container
A practical way to get familiar with Docker is to pull an nginx image from Docker Hub, start a container, modify the page it serves, then turn that modified container into a new image, tag it, and push it to your own Docker Hub account.
Pull an image
<table> <thead> <tr> <th>1 2 3</th>
<th>docker search nginx # 搜索镜像 docker pull nginx # 拉取镜像 docker images # 查看本地镜像, 也可使用 docker image ls 命令</th>
</tr>
</thead>
<tbody>
<tr>
<td></td>
<td></td>
</tr>
</tbody>
</table>
Start a container
<table> <thead> <tr> <th>1 2</th>
<th>docker run -d --name nginx-web -p 81:80 nginx:latest docker ps # 查看正在运行的容器</th>
</tr>
</thead>
<tbody>
<tr>
<td></td>
<td></td>
</tr>
</tbody>
</table>
What the options mean:
run: start a new container-d: run it in the background--name: assign a container name; otherwise Docker generates a random one-p: map a container port (80) to a host port (81). Without port mapping, other devices will not be able to access network services inside the container directly
Change the content inside the container
Enter the running container:
<table> <thead> <tr> <th>1</th>
<th>docker exec -it nginx-web bash</th>
</tr>
</thead>
<tbody>
<tr>
<td></td>
<td></td>
</tr>
</tbody>
</table>
Option breakdown:
exec: run a new command inside an already running container-it: allocate an interactive pseudo-terminalnginx-web: the container name; a container ID works toobash: the command to run inside the container, equivalent to/bin/bash
Once inside, install nano if you want a lightweight editor:
apt update && apt install nano
You can install vim instead, but it takes slightly more space than nano.
Then edit /usr/share/nginx/html/index.html and replace its contents with any text you want to display on the page.
If you do not want to install an editor, you can replace the file directly with:
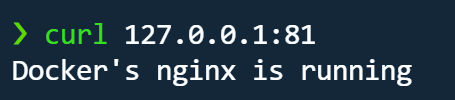
echo "Docker's nginx is running" > /usr/share/nginx/html/index.html
Exit the container with exit, return to the host, and check the result:
curl 127.0.0.1:81
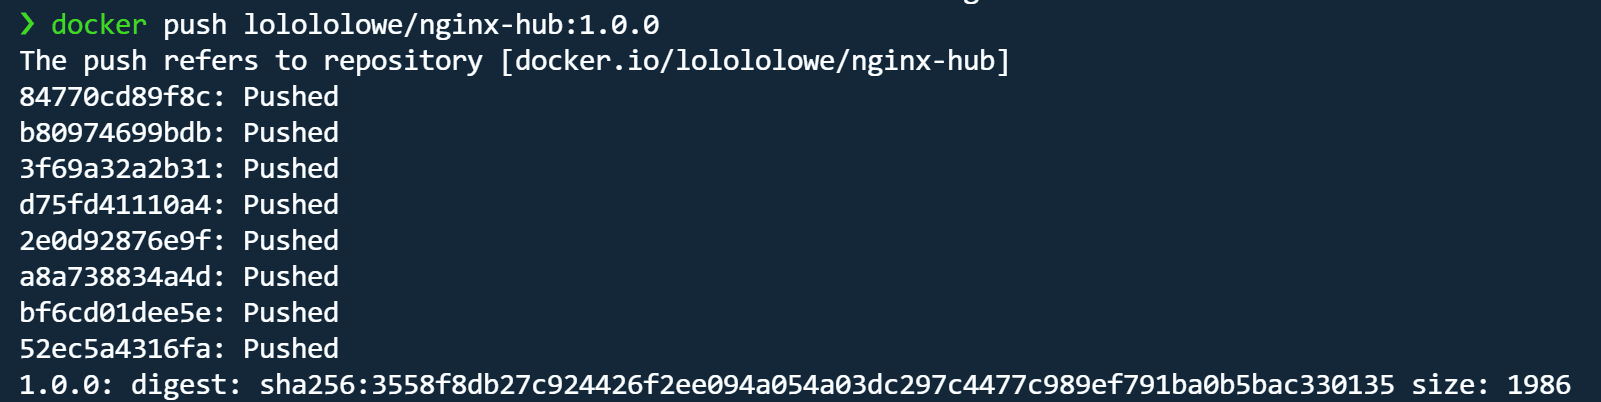
Commit the container as an image and add a tag
<table> <thead> <tr> <th>1 2</th>
<th>docker commit -m "First commit" -a lololowe nginx-web lolololowe/nginx-hub:1.0.0 docker images # 查看新镜像</th>
</tr>
</thead>
<tbody>
<tr>
<td></td>
<td></td>
</tr>
</tbody>
</table>
This turns the nginx-web container into a new image named lolololowe/nginx-hub with the tag 1.0.0. You can use the container ID instead of the name if you prefer.
If you do not specify a tag, Docker uses latest by default.
The lolololowe part is the Docker Hub username. It must be included, otherwise pushing the image later will fail because Docker will try to treat it as an official namespace.
If you want to create another tag for the same image:
<table> <thead> <tr> <th>1</th>
<th>docker tag lolololowe/nginx-hub:1.0.0 lolololowe/nginx-hub:1.0.1</th>
</tr>
</thead>
<tbody>
<tr>
<td></td>
<td></td>
</tr>
</tbody>
</table>
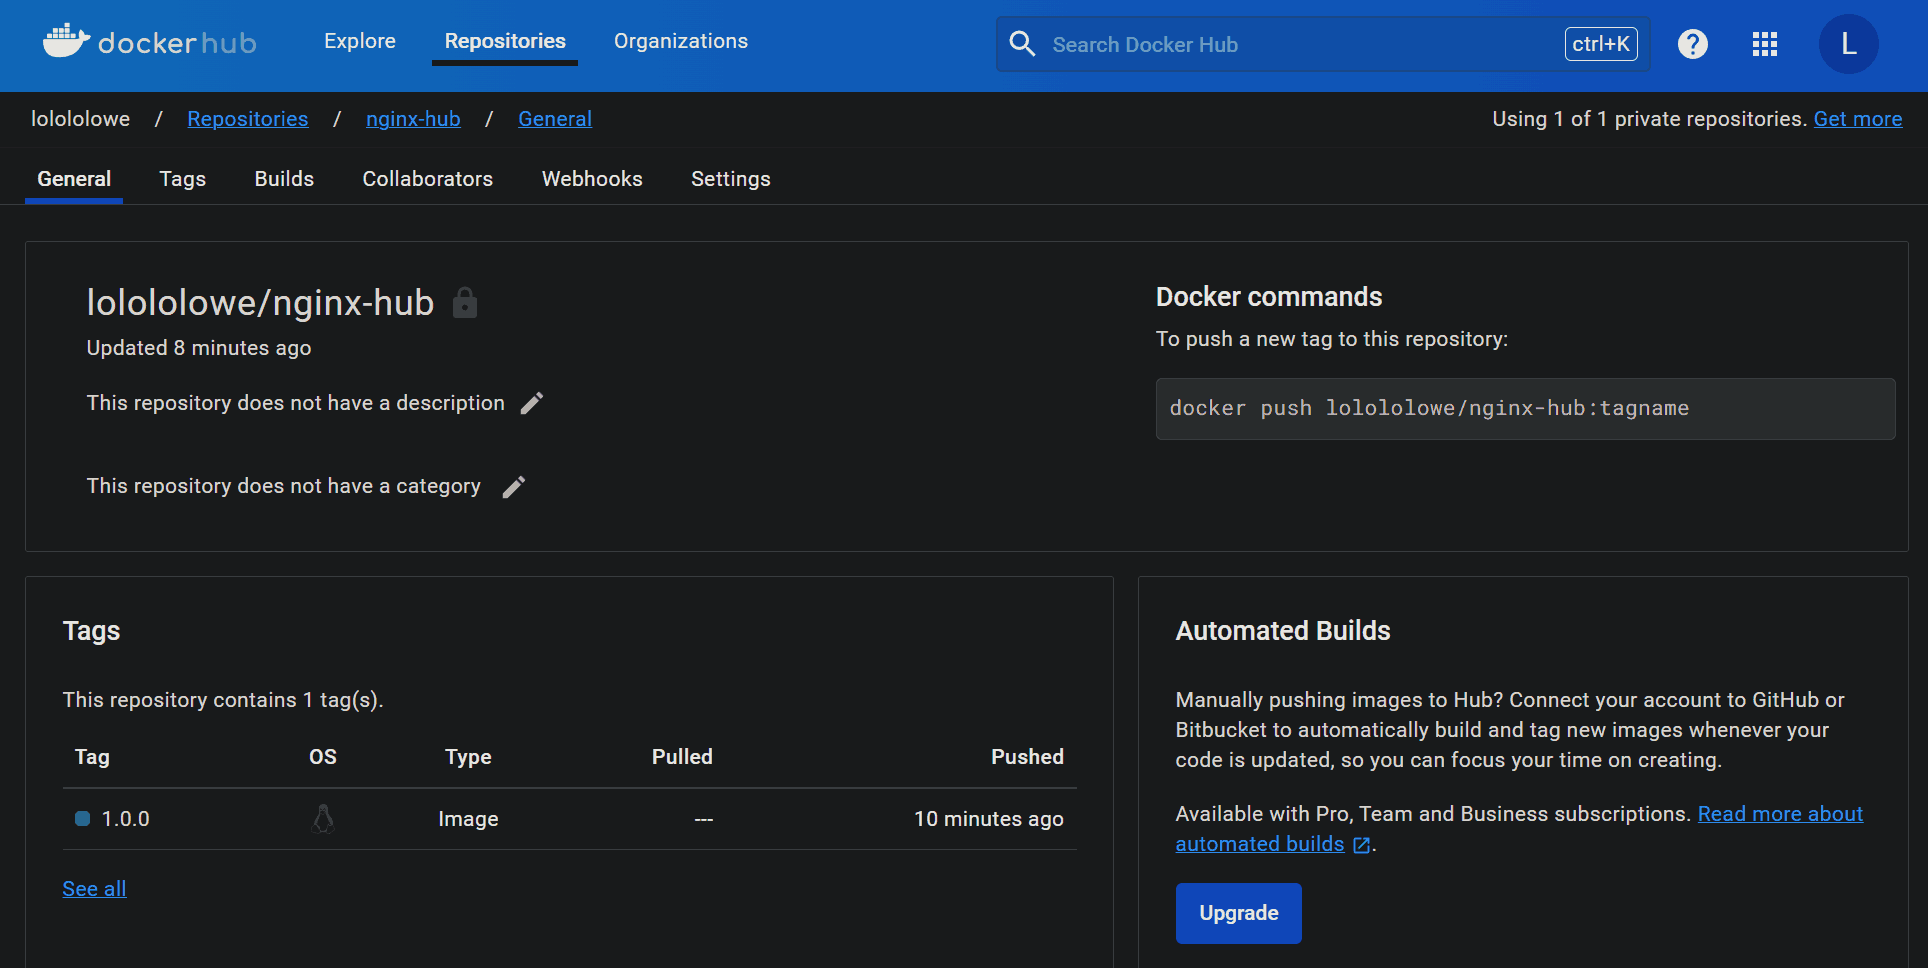
Push the image to Docker Hub
<table> <thead> <tr> <th>1 2</th>
<th>docker login -u lolololowe # 登录dokcer hub docker push lolololowe/nginx-hub:1.0.0</th>
</tr>
</thead>
<tbody>
<tr>
<td></td>
<td></td>
</tr>
</tbody>
</table>
If your Docker Hub account has 2FA enabled, log in with a personal access token instead of your account password: https://docs.docker.com/security/for-developers/access-tokens/
Building the Same Image with a Dockerfile
The earlier pull-and-modify flow can be replaced with a Dockerfile, which is cleaner and repeatable.
# 使用官方的nginx镜像
FROM nginx:latest

# 构建镜像时运行的命令
RUN echo "Docker's nginx is running" > /usr/share/nginx/html/index.html

# 声明容器运行时使用的端口,不会进行端口映射
EXPOSE 80

# 启动容器时运行的命令
CMD ["nginx", "-g", "daemon off;"]
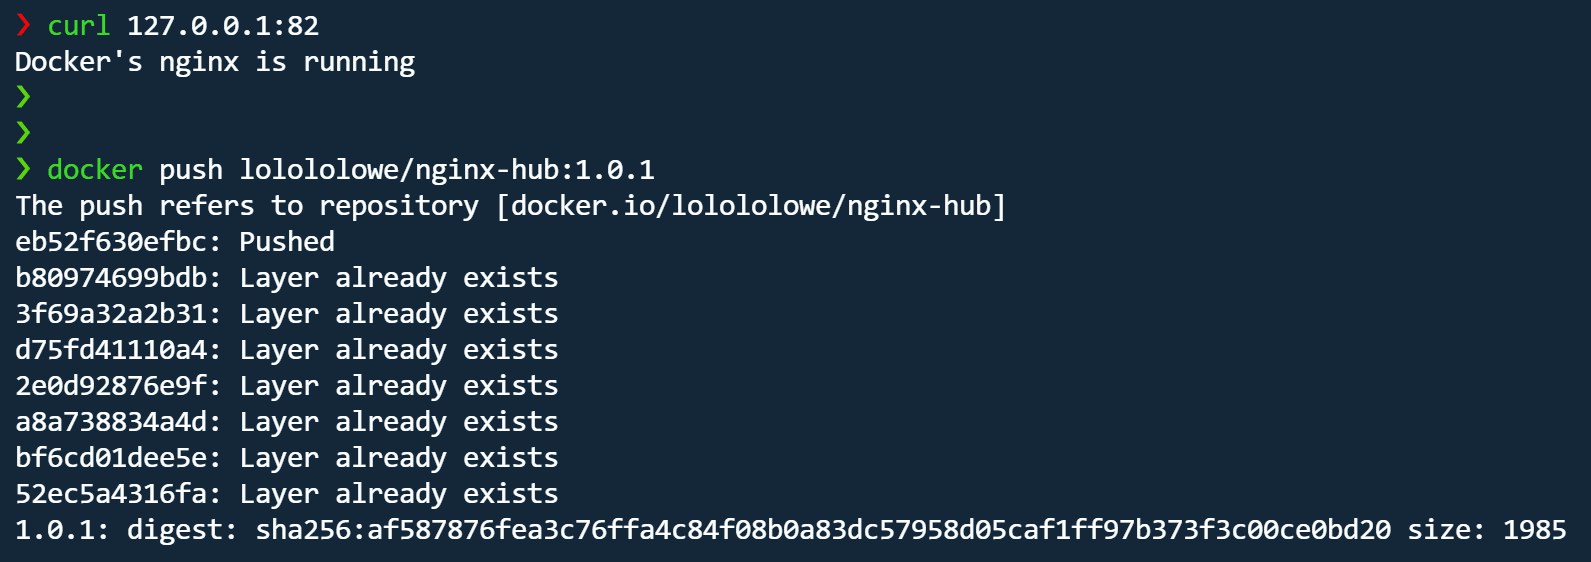
Build the image:
<table> <thead> <tr> <th>1</th>
<th>docker build -t lolololowe/nginx-hub:1.0.1 .</th>
</tr>
</thead>
<tbody>
<tr>
<td></td>
<td></td>
</tr>
</tbody>
</table>
Run it in the background and verify the result:
<table> <thead> <tr> <th>1 2 3</th>
<th>docker run -d --name mynginx -p 82:80 lolololowe/nginx-hub:1.0.1 # 启动容器并映射容器的80端口到本机的82端口 docker exec mynginx cat /usr/share/nginx/html/index.html # 查看容器内的网页内容 curl 127.0.0.1:82 # 访问本机82端口</th>
</tr>
</thead>
<tbody>
<tr>
<td></td>
<td></td>
</tr>
</tbody>
</table>
Push the image:
<table> <thead> <tr> <th>1 2</th>
<th>docker login -u lolololowe docker push lolololowe/nginx-hub:1.0.1</th>
</tr>
</thead>
<tbody>
<tr>
<td></td>
<td></td>
</tr>
</tbody>
</table>
Orchestrating Multiple Containers with Docker Compose
For multi-container setups, Docker Compose is much easier than starting each container manually. A simple example is running MySQL and phpMyAdmin together.
<table> <thead> <tr> <th>1 2 3 4 5 6 7 8 9 10 11 12 13 14 15 16 17</th>
<th>version: '3.1' # Docker Compose文件的版本 services: # 定义要运行的所有docker服务 db: # 自定义服务名 image: mysql:5.7 # 指定镜像以及版本 restart: always # 设置重启策略为始终重启 environment: # 设置环境变量 MYSQL_ROOT_PASSWORD: root # 定义MySQL root用户的密码 phpmyadmin: # 自定义服务名 image: phpmyadmin # 指定镜像,默认为最新版本 restart: always # 设置重启策略为始终重启 depends_on: # 定义服务之间的启动顺序 - db # phpmyadmin依赖于db服务,因此在db服务启动之前,phpmyadmin服务不会启动 ports: # 定义服务的端口映射 - 8080:80 # 将phpmyadmin服务的80端口映射到宿主机的8080端口,地址默认绑定到0.0.0.0 environment: # 设置环境变量 - PMA_ARBITRARY=1 # 允许phpmyadmin连接任意数据库</th>
</tr>
</thead>
<tbody>
<tr>
<td></td>
<td></td>
</tr>
</tbody>
</table>
Start the stack with:
<table> <thead> <tr> <th>1 2</th>
<th>docker compose up -d dokcer ps # 可以看到新增的2个容器</th>
</tr>
</thead>
<tbody>
<tr>
<td></td>
<td></td>
</tr>
</tbody>
</table>
A few details matter here:
- If the file is not named
docker-compose.yml, use-fto point to it explicitly, for example:docker compose -f ~/compose.yml up -d. - With Docker version
>= 20.10, use docker compose. On older versions, use docker-compose.
To log in through phpMyAdmin, first inspect the MySQL container IP:
docker inspect docker-db-1 | grep IPAddress
Then open 127.0.0.1:8080 in a browser and enter the MySQL container IP along with the username and password.

To remove the containers, run this in the directory where the Compose file is located:
docker compose down
Or use -f to specify the file path from anywhere.
Common Docker Commands
<table> <thead> <tr> <th>1 2 3 4 5 6 7 8 9 10 11 12 13 14 15 16 17 18 19 20 21 22 23 24 25 26 27 28 29 30 31 32 33 34 35 36 37 38 39 40 41 42 43 44</th>
<th># 将用户加入docker组,以实现免root执行docker命令 sudo usermod -aG 用户名 docker # 查看服务端和客户端的版本信息 docker version # 运行容器 docker run -d --name 容器名称 -p 宿主机端口:容器端口 --restart unless-stopped -v 宿主机路径:容器路径 [用户名/]<镜像名>:<标签> # 修改现有容器的重启策略 docker update --restart=<no|always|on-failure|unless-stopped> <容器名或容器ID> # 查看容器当前的重启策略 docker inspect <容器名或容器ID> | grep -A 1 RestartPolicy # 进入容器 docker exec -it 容器名称/ID /bin/bash # 实时查看所有容器(包括已停止)的运行占用 docker stats -a # 停止所有容器 docker stop $(docker ps -aq) # 指定Dockerfile文件来构建镜像 docker build -f /path/to/your/Dockerfile -t [用户名/]<镜像名>:<标签> . # 指定docker-compose文件来构建并运行镜像 docker compose up -d -f /path/to/your/docker-compose.yml # docker compose停止并删除容器 docker compose down -f /path/to/your/docker-compose.yml # 提交容器为新镜像 docker commit -m "信息" -a "作者" 容器名称/ID [用户名/]<镜像名>:<标签> # 推送镜像 docker push <用户名>/<镜像名>:<标签> # 打包镜像 docker save -o 镜像.tar [用户名/]<镜像名>:<标签> # 导入镜像 docker load -i 镜像.tar</th>
</tr>
</thead>
<tbody>
<tr>
<td></td>
<td></td>
</tr>
</tbody>
</table>
Practical Notes
- Ports published by Docker cannot be controlled directly by UFW, which can create security risks. One workaround is to bind the published port explicitly to the loopback address on the host and then use Nginx as a reverse proxy. Another approach is to use the
ufw-dockersolution described here: https://github.com/chaifeng/ufw-docker?tab=readme-ov-file#问题 - Both volumes and bind mounts can be used for data sharing and persistence. A volume looks like
-v volume_name:/path_in_container, while a bind mount looks like-v /path_in_host:/path_in_container. You can list existing volumes withdocker volume ls. execonly works on containers that are already running. For example,docker exec -it container_id /bin/bashopens a new Bash shell inside a running container. If you want to launch a shell when starting a container, put the shell command at the end ofdocker run, like this:docker run -it image:tag /bin/bash.- With the
alwaysrestart policy, a container will restart if it exits unexpectedly or if the Docker daemon restarts. If you stop the container manually, it will not restart on its own. More details are available in the official docs: https://docs.docker.com/config/containers/start-containers-automatically/#use-a-restart-policy