FFmpeg doesn't ship with a friendly installer or a graphical window. On Windows it arrives as a collection of command-line tools, and that alone is enough to make plenty of people back away. The payoff is real, though: once it's on your machine, one utility can convert formats, encode and decode, apply filters, cut clips, handle streaming, and inspect media files in detail. It supports practically every audio, video, and image format you're likely to encounter.
You may never have opened FFmpeg directly, but a lot of familiar software relies on it underneath — Format Factory, PotPlayer, and DaVinci Resolve are common examples. Because it lives on the command line in Windows, the initial learning curve is a bit steeper. Get past that, and everyday audio/video work becomes much faster. It also pairs well with local AI command-line tools such as iFlow and OpenCode when you need to process media files on your own machine.
The quick route: Winget
First, check that Winget is available. It's built into Windows 10 version 1709 and later, as well as Windows 11.
Open PowerShell or Command Prompt and run:
winget install --id Gyan.FFmpeg -e
When the install finishes, close the terminal and open a new one. Then check:
ffmpeg -version
This approach adds FFmpeg to your system PATH automatically, which saves you the manual configuration step.
The manual route
You might prefer a manual install if you want the latest git master build, or if Winget isn't available on your system.
Download FFmpeg
Go to the official build page:
https://www.gyan.dev/ffmpeg/builds/
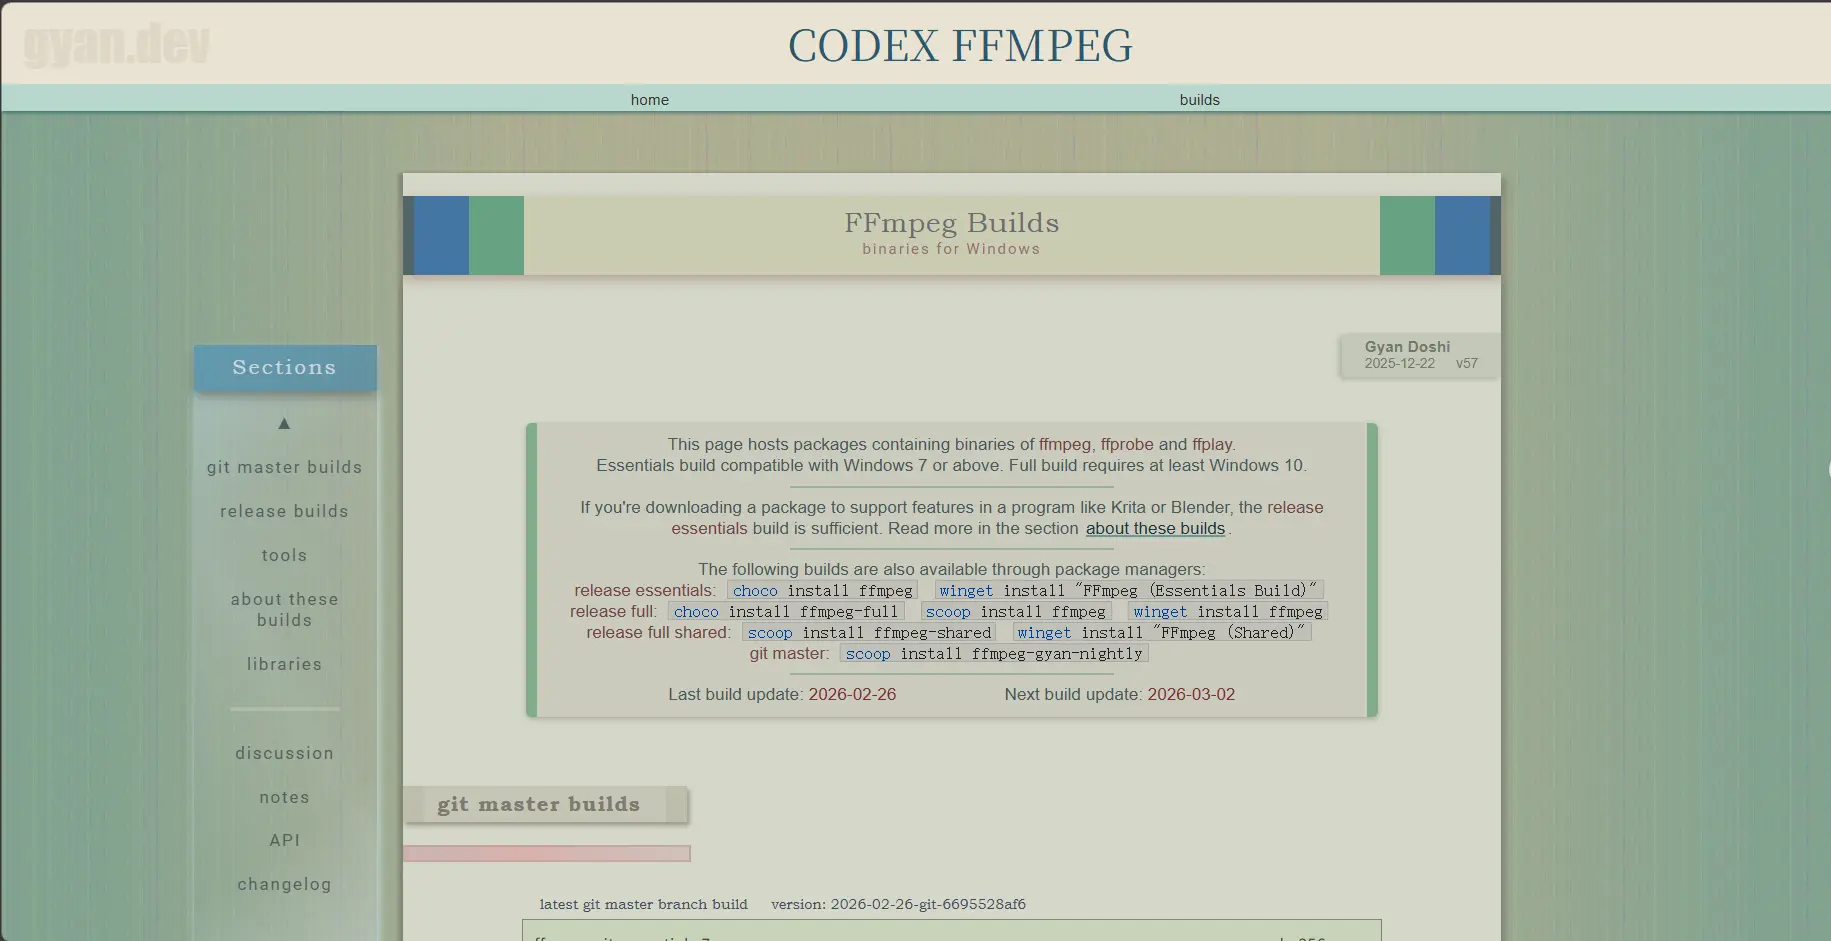
The page is split into two main sections:
- git master builds — the newest development builds.
- release builds — stable releases.
Each section offers two package types:
- essentials — includes the codecs most people use day to day, such as H.264, H.265, AAC, MP3, and VP9.
- full — includes nearly every codec library and is considerably larger.
If you're unsure which to pick, start with the stable release and the essentials package. Choose the full package if you need broader codec coverage, and choose a git master build only if you specifically want the latest development version.
Download and unpack
Click the .7z or .zip file for the build you want. A multithreaded download manager like IDM can speed this up.
Extract the archive to a fixed location you don't plan to move around, for example D:\FFmpeg.
Inside the extracted folder you'll find a bin directory containing three core executables:
ffmpeg.exeffprobe.exeffplay.exe
You can run them directly from inside bin, but to call them from any directory you'll need to add that folder to your PATH.
Add FFmpeg to your PATH
- Open the
binfolder and copy its full path, such asD:\FFmpeg\bin. - Type environment variables into the Windows search bar and open Edit system environment variables.
- Click the Environment Variables button.
- In the System variables section, find
Path, select it, and click Edit. - Click New on the right and paste the
binpath.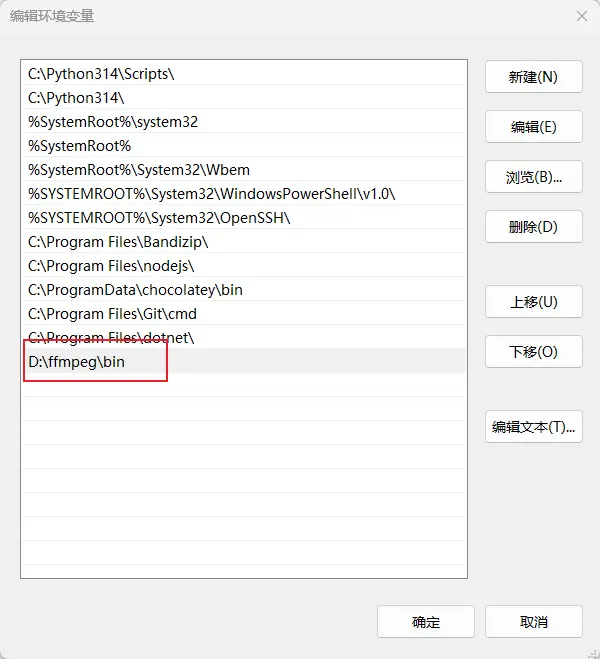
- Click OK through the remaining dialogs to save.
NOTE
After changing PATH, you must close and reopen every Command Prompt and PowerShell window before the change takes effect.
Check the installation
Press Win + R, type cmd, and hit Enter. Then run:
ffmpeg -version
If you see version information and build configuration details, the installation is working.