PGP, OpenPGP, and GnuPG
PGP began as an encryption suite created by Phil Zimmermann. As it became widely adopted, it was standardized into the OpenPGP specification. GPG, or GnuPG, is GNU’s implementation that follows the OpenPGP standard.
In practice, people often use PGP to refer to the broader OpenPGP ecosystem rather than the original commercial software. That is why terms like PGP key, PGP signature, and PGP public key server are more accurate when talking about the format or protocol itself. GnuPG and gpg are better reserved for the actual tool you use locally.
GnuPG does more than just encryption and signing. It is a complete OpenPGP implementation, including key management and support for many of the optional algorithms defined by the protocol.
Why sign Git commits at all?
Git identifies authors through the name and email stored in commit metadata. That is convenient, but it also means those fields can be forged. Anyone with repository access can set a different author identity and make a commit appear to come from someone else.
This is not a theoretical problem. There are scripts that can rewrite commit identity information in one shot, and it is trivial to configure Git with the email address of a well-known developer. Without a cryptographic signature, commit authorship is largely based on trust in plain text metadata.
Signing commits fixes that gap. A signed commit proves that the commit was produced using your private key, and code hosting platforms such as GitLab can then mark the commit as verified with the familiar green badge.
How verification works
A PGP keypair has two parts:
secret key: your private key, which must be kept safepublic key: the key you can publish so others can verify what you sign
The basic rule is straightforward:
- Sign with the private key, verify with the public key — this proves the message really came from you
- Encrypt with the public key, decrypt with the private key — this ensures only you can read the encrypted content
For Git commit signing, the verification flow looks like this:
- Your PGP identity is associated with an email address.
- You upload the public key generated by GPG to a platform such as GitLab.
- You configure local Git with your username, email, and the fingerprint of the key used for signing.
- You enable signing when committing, either per commit or automatically.
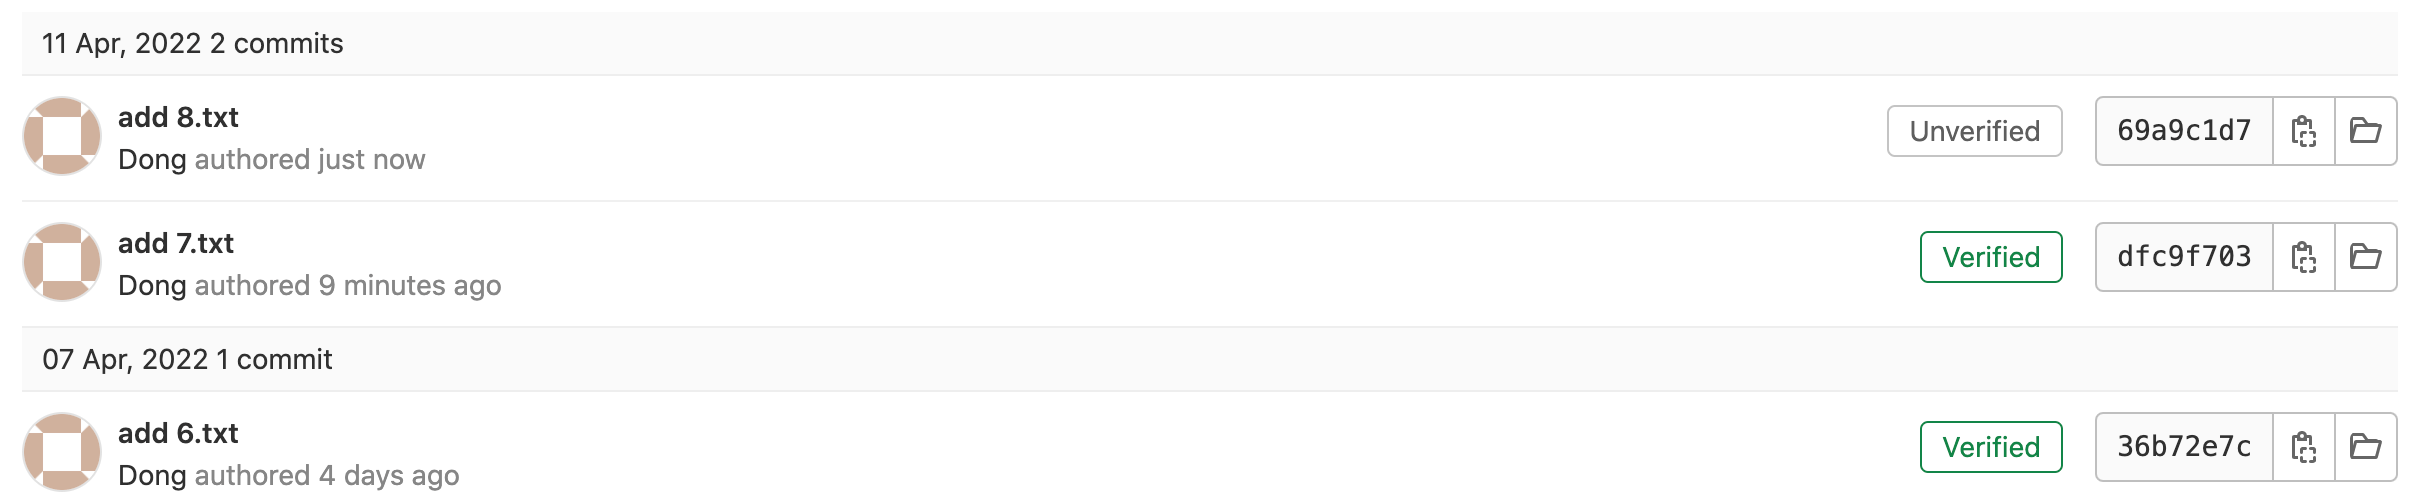
- The commit carries signature data. GitLab checks that signature against the public key you uploaded and confirms that the email and signing identity match.
- If the commit uses someone else’s email address but is signed with your own key, the platform will usually show it as
Unverifiedrather than recognizing it as that person’s commit.
Once that is in place, the platform can confidently display a Verified status.
Generating a PGP key
You can create a key from the command line, but a graphical tool such as GPG Tools is often more convenient.
One practical note: if you installed gnupg separately through Homebrew, version mismatches can sometimes cause confusing results when running the commands below. GPG Tools already includes gnupg, so a separate installation is not always necessary.
Export the public key and add it to GitLab
First, list your public keys:
$ gpg --list-keys
Then export the public key:
$ gpg --armor --export <Fingerprint>
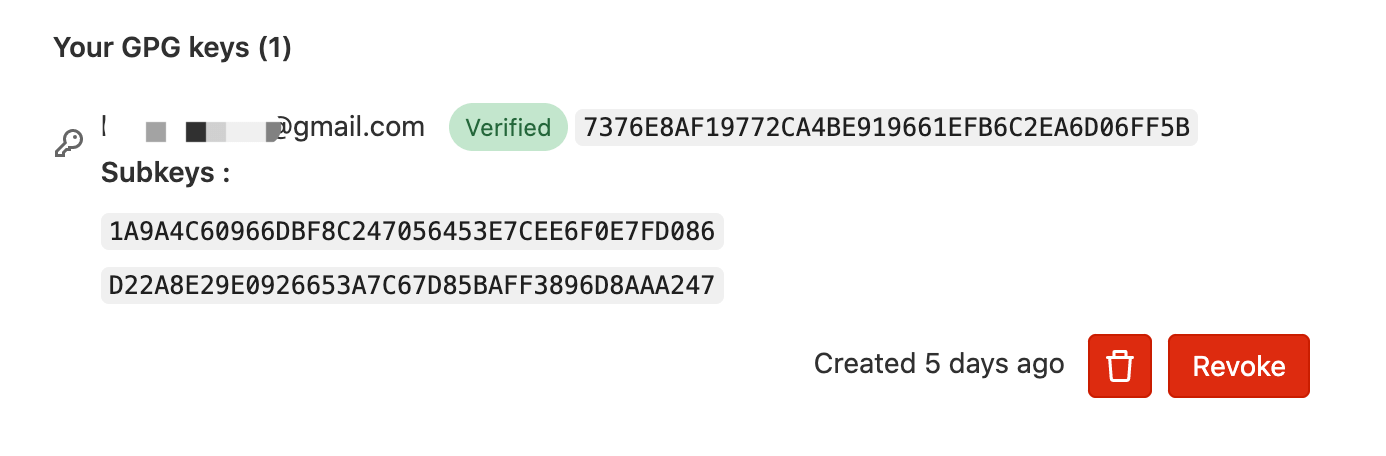
Copy the exported key and add it in your user GPG settings on GitLab.
After adding it, GitLab will display the fingerprint of the uploaded public key.
There is also a simple way to view a user’s public key directly from a URL ending in .gpg, using the username in the path. For example:
https://gitlab.com/dong.gpg
Configure Git to sign commits
About subkeys
In many setups, a subkey is used for day-to-day signing instead of the primary key. The exported public key already contains fingerprint information for both the primary key and its subkeys, so Git can be configured with a subkey fingerprint as well.
Here is an example of a subkey fingerprint:
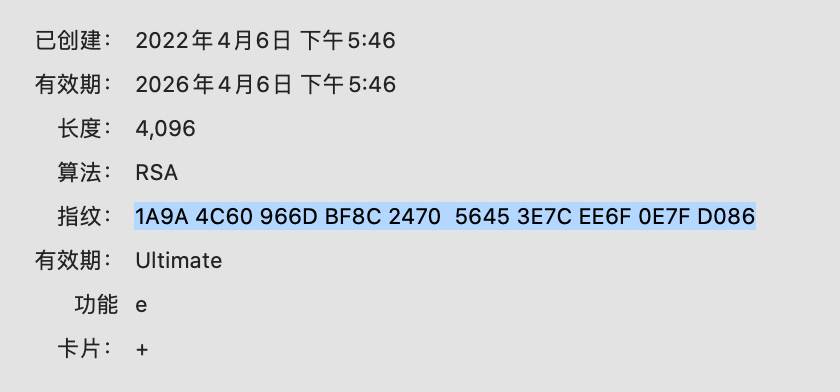
A fingerprint is 40 characters long, but shorter forms may still identify the same key. For example, 3E7CEE6F0E7FD086 (16 characters) and 0E7FD086 (8 characters) can both refer to that key.
To assign a signing key for the current project:
git config user.signingkey 3E7CEE6F0E7FD086
To make Git sign commits automatically:
git config commit.gpgsign true
After that, later commits should show the Verify badge on GitLab.
If you do not want automatic signing, you can enable signing only when creating a commit:
git commit -s -m "add ..."
Inspecting signed commits
You can view commit history along with signature information using:
git log --show-signature
Example output:
commit 85624224009a71c3ded5fb1353d535ba85210742
gpg: 签名建立于 三  4/ 6 19:09:45 2022 CST
gpg:               使用 RSA 密钥 7376E8AF19772CA4BE919661EFB6C2EA6D06CCFF
gpg: 完好的签名,来自于 “dong (Orz) <[email protected]>” [绝对]
Author: dong <[email protected]>
Date:   Wed Apr 6 19:09:45 2022 +0800

    add 2.txt

commit b6463db236b4953de7ddb1fea41ff3f6dbf7c2fc
Author: dong <[email protected]>
Date:   Wed Apr 6 19:03:36 2022 +0800

    add 1.txt
To inspect the full contents of a commit object in detail:
git cat-file -p <commit-sha>
A signed commit includes extra signature data inside the commit object itself.
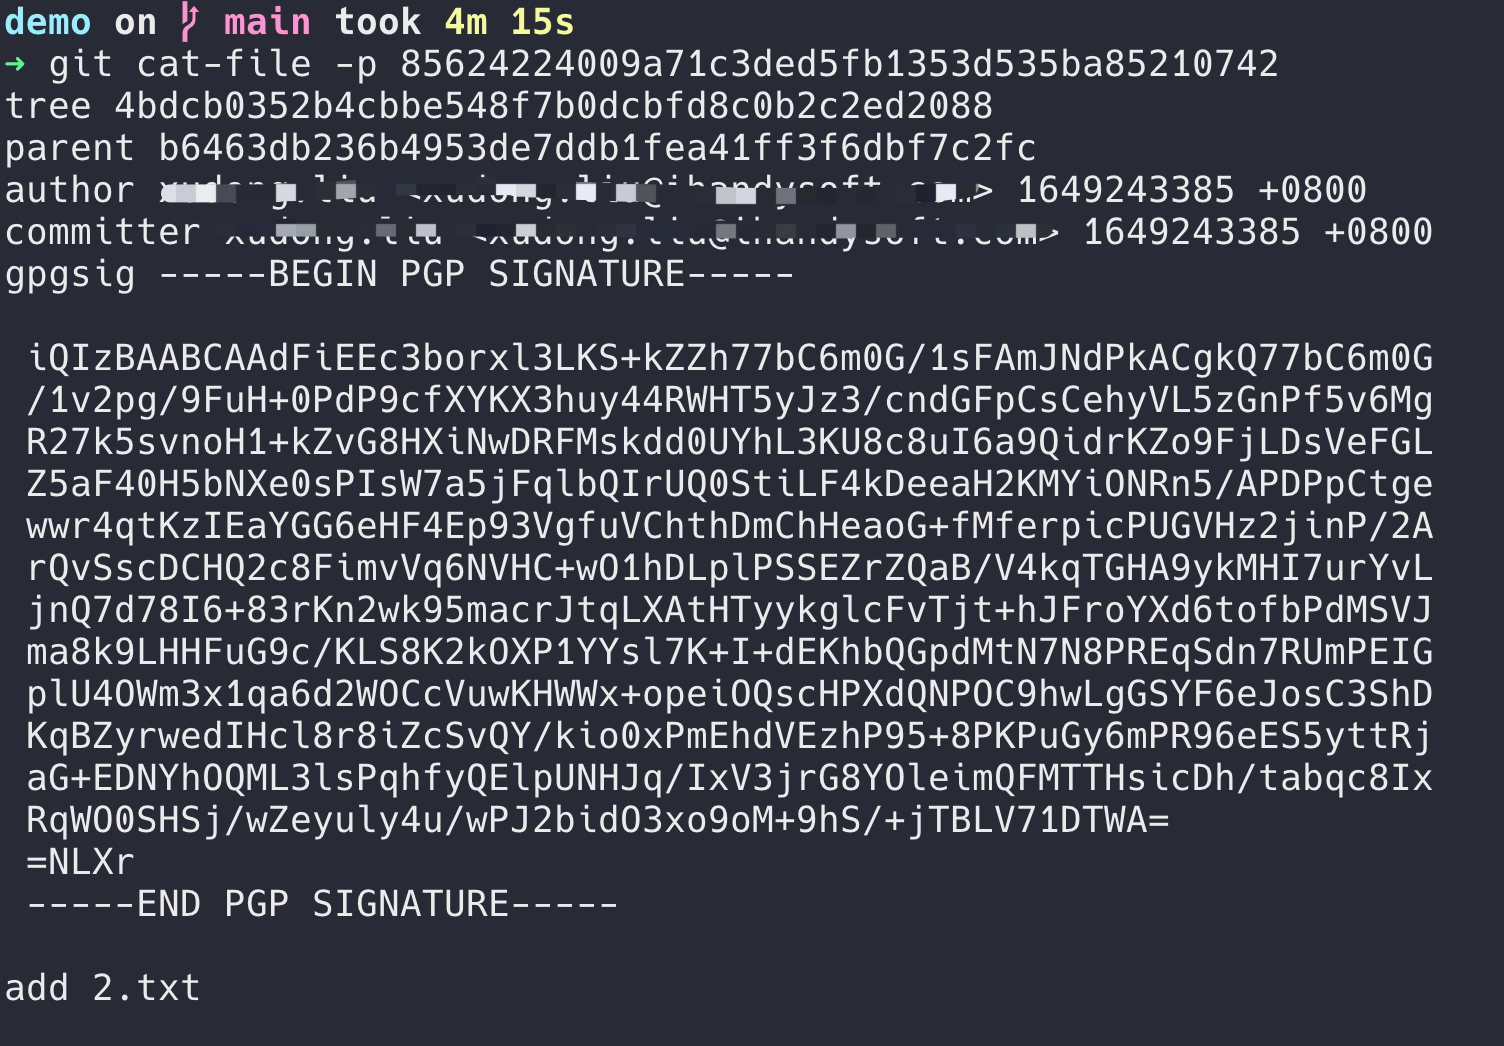
That embedded signature is what GitLab checks to confirm the commit really came from you, and why it can safely display the commit as Verified.