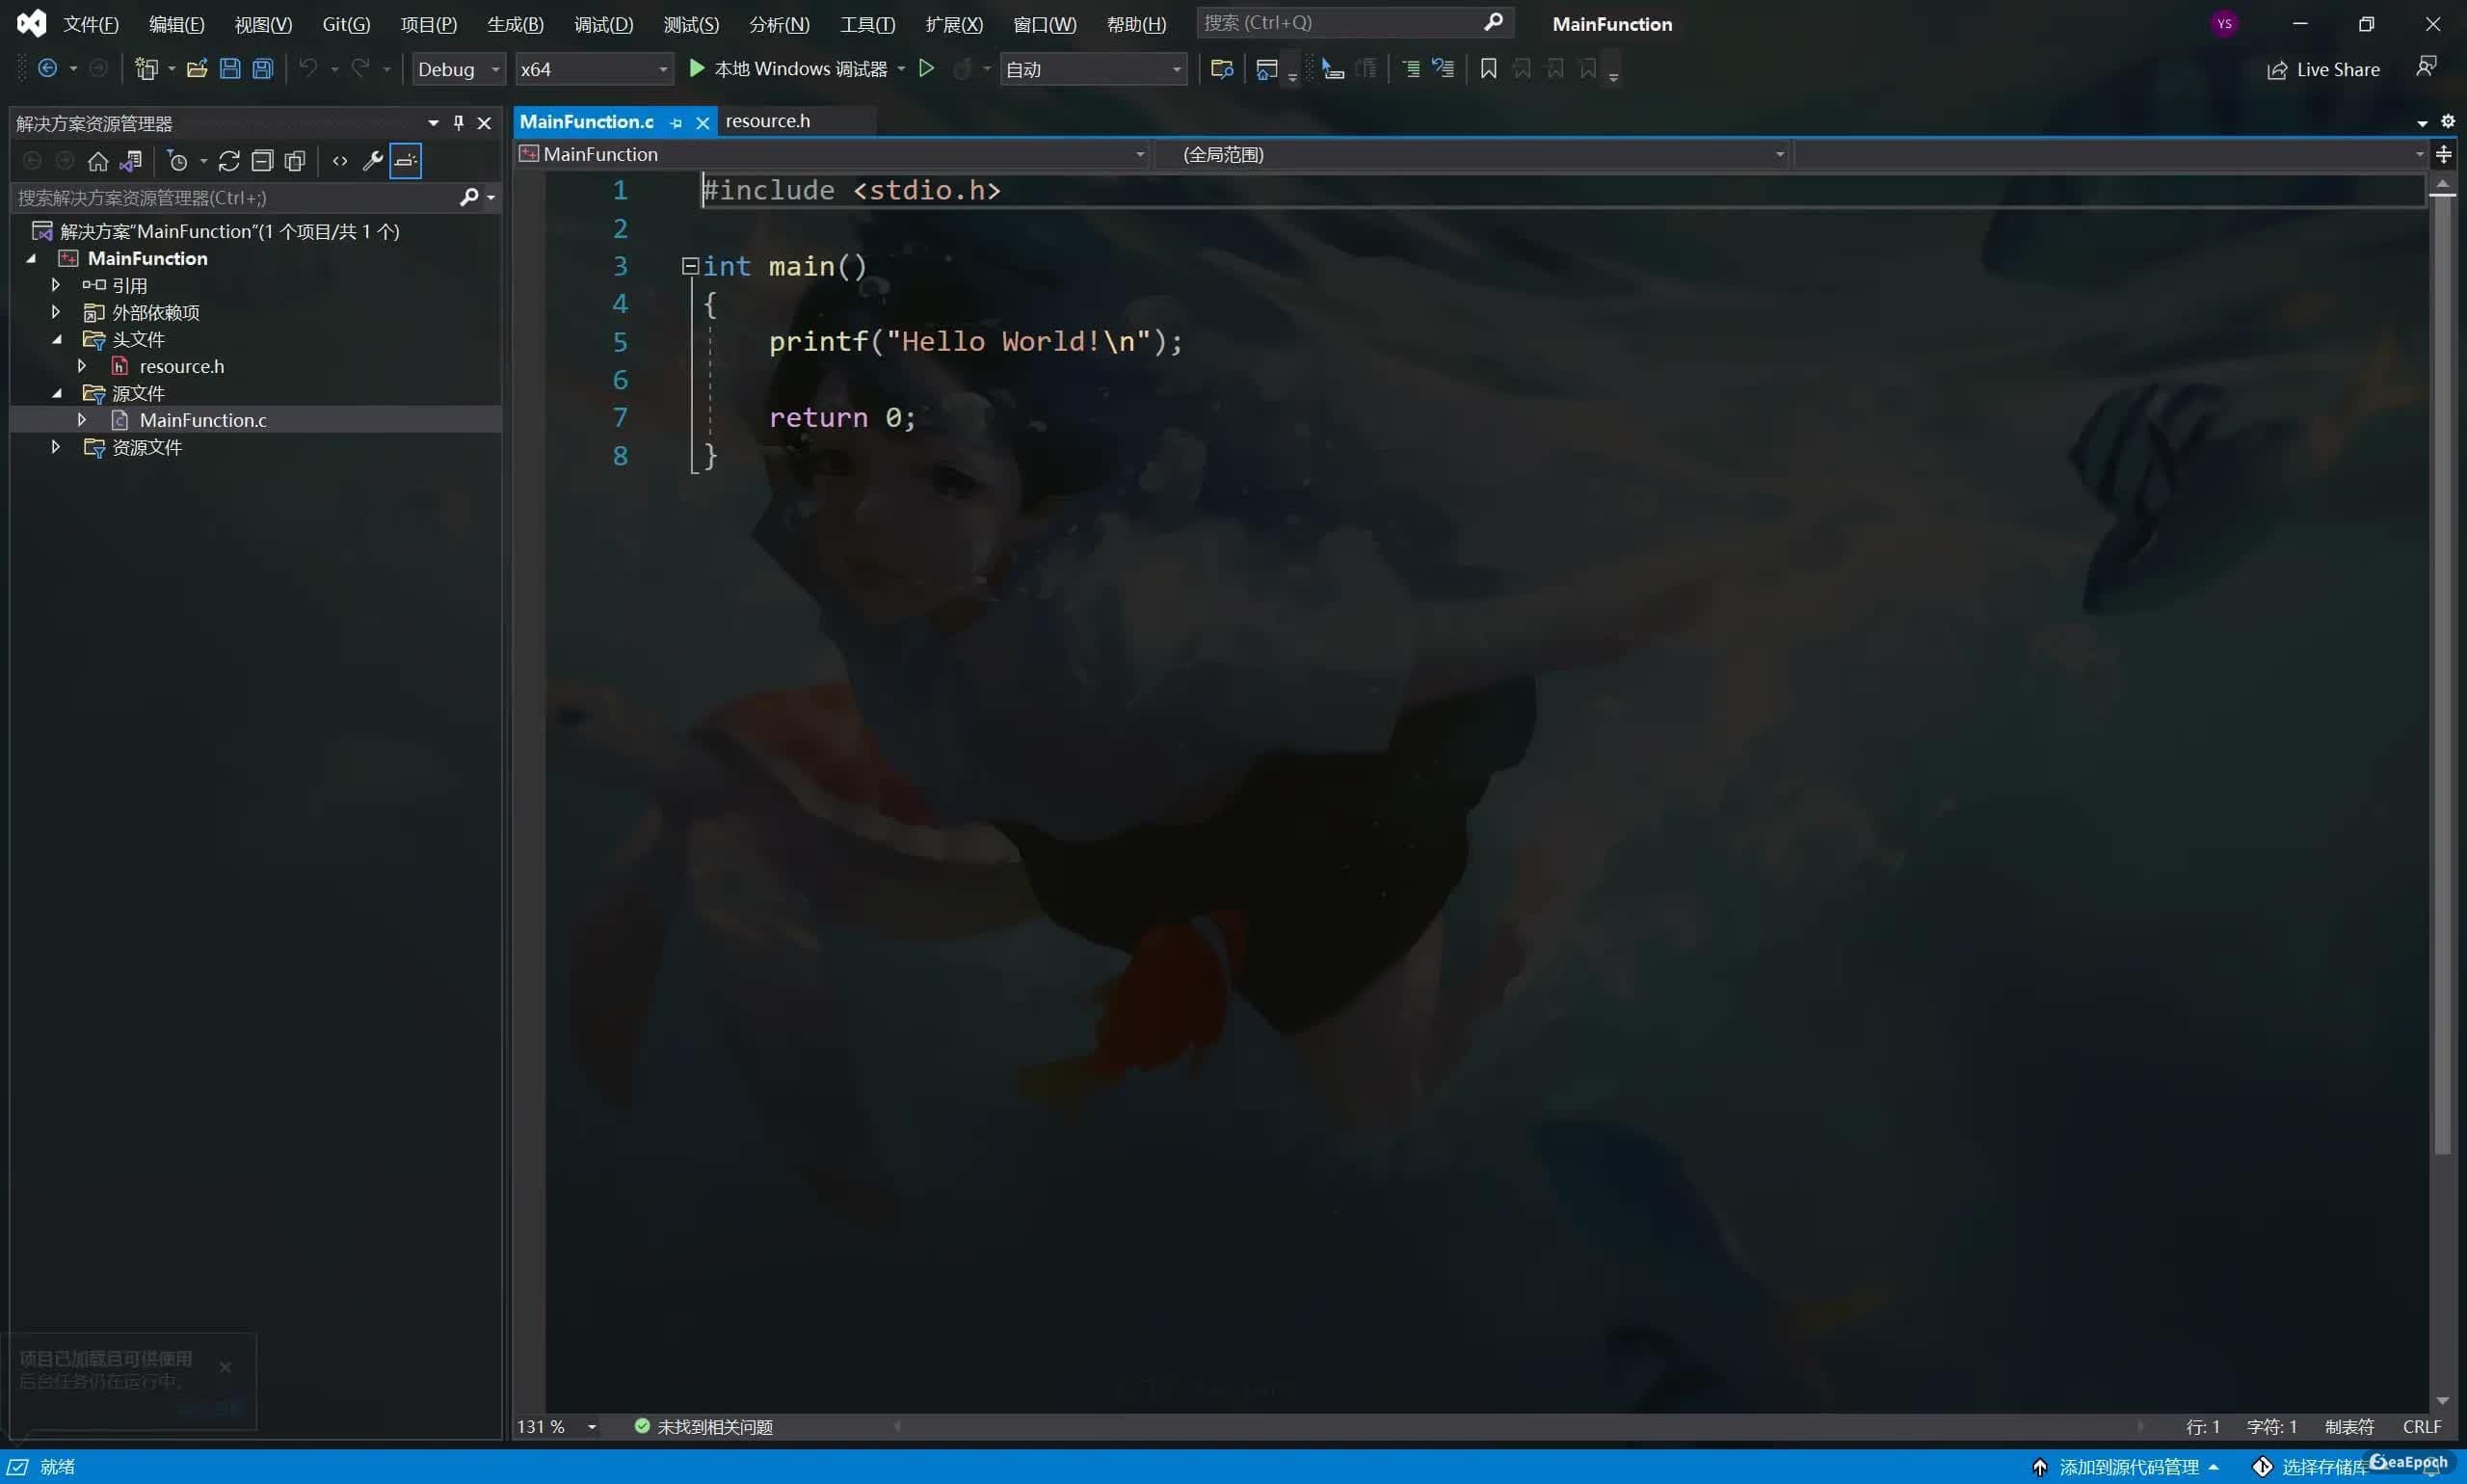
A lot of people never notice that the Visual Studio editor can use a background image too.
Install the required extensions
To make this work, you need two things: the background-image extension itself, and a theme editor so the interface can be made transparent enough for the image to show through properly.
ClaudiaIDE
In Visual Studio, open the extension manager and search for ClaudiaIDE:
- Extensions -> Manage Extensions -> Online
- Enter
ClaudiaIDE
You should see the ClaudiaIDE extension in the results.
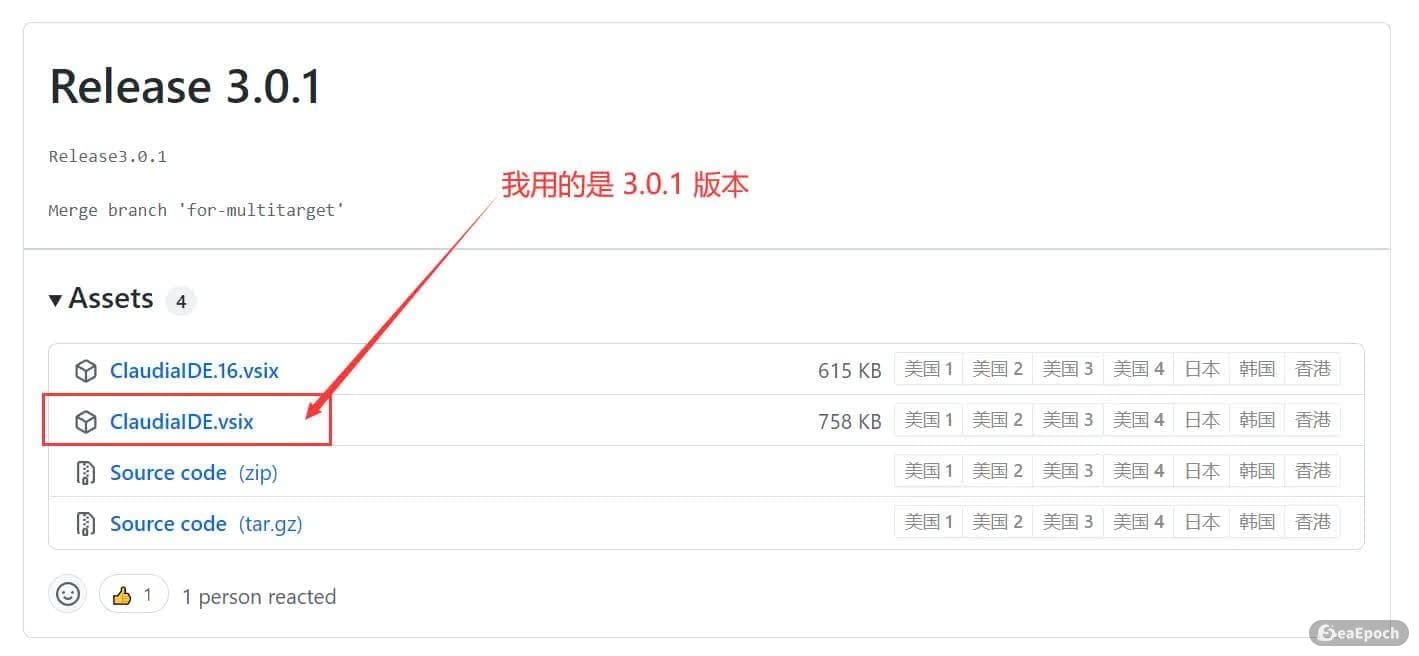
For Visual Studio 2022, it is better not to use the newest release blindly. As of 2021-12-26, version 3.0.5 had a bug. If you are on VS 2022, using an older release from the ClaudiaIDE GitHub releases page is safer. One thing to watch out for: VS 2022 only supports 3.0.1+, so check the version notes carefully before installing.

Theme editing extension
You also need a theme editor extension, and the name depends on your Visual Studio version.
Visual Studio 2022
Open:
- Extensions -> Manage Extensions -> Online
Search for Visual Studio Color Theme Designer 2022, then install the matching result.

Visual Studio 2019 and earlier
Open:
- Tools -> Extensions and Updates -> Online
Search for Color Theme Editor for Visual Studio 2019.
If you use another older release, pick the extension version that matches your own Visual Studio version number. The exact steps differ a little between versions, so the walkthrough below uses VS 2022 as the example.
Set the background image
Open:
- Tools -> Options -> ClaudiaIDE
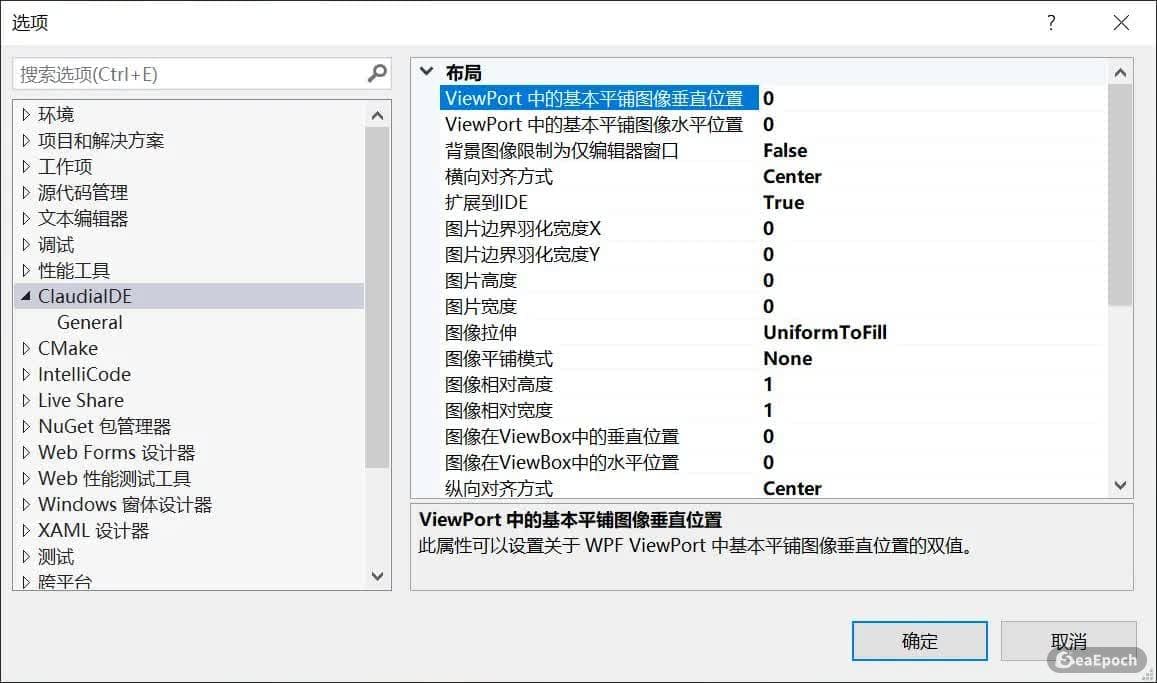
Then add your own image and configure it the same way shown here:

At this point the image is selected, but to make the overall look work well, the theme itself still needs to be adjusted.
Make the theme transparent and extend it across the IDE
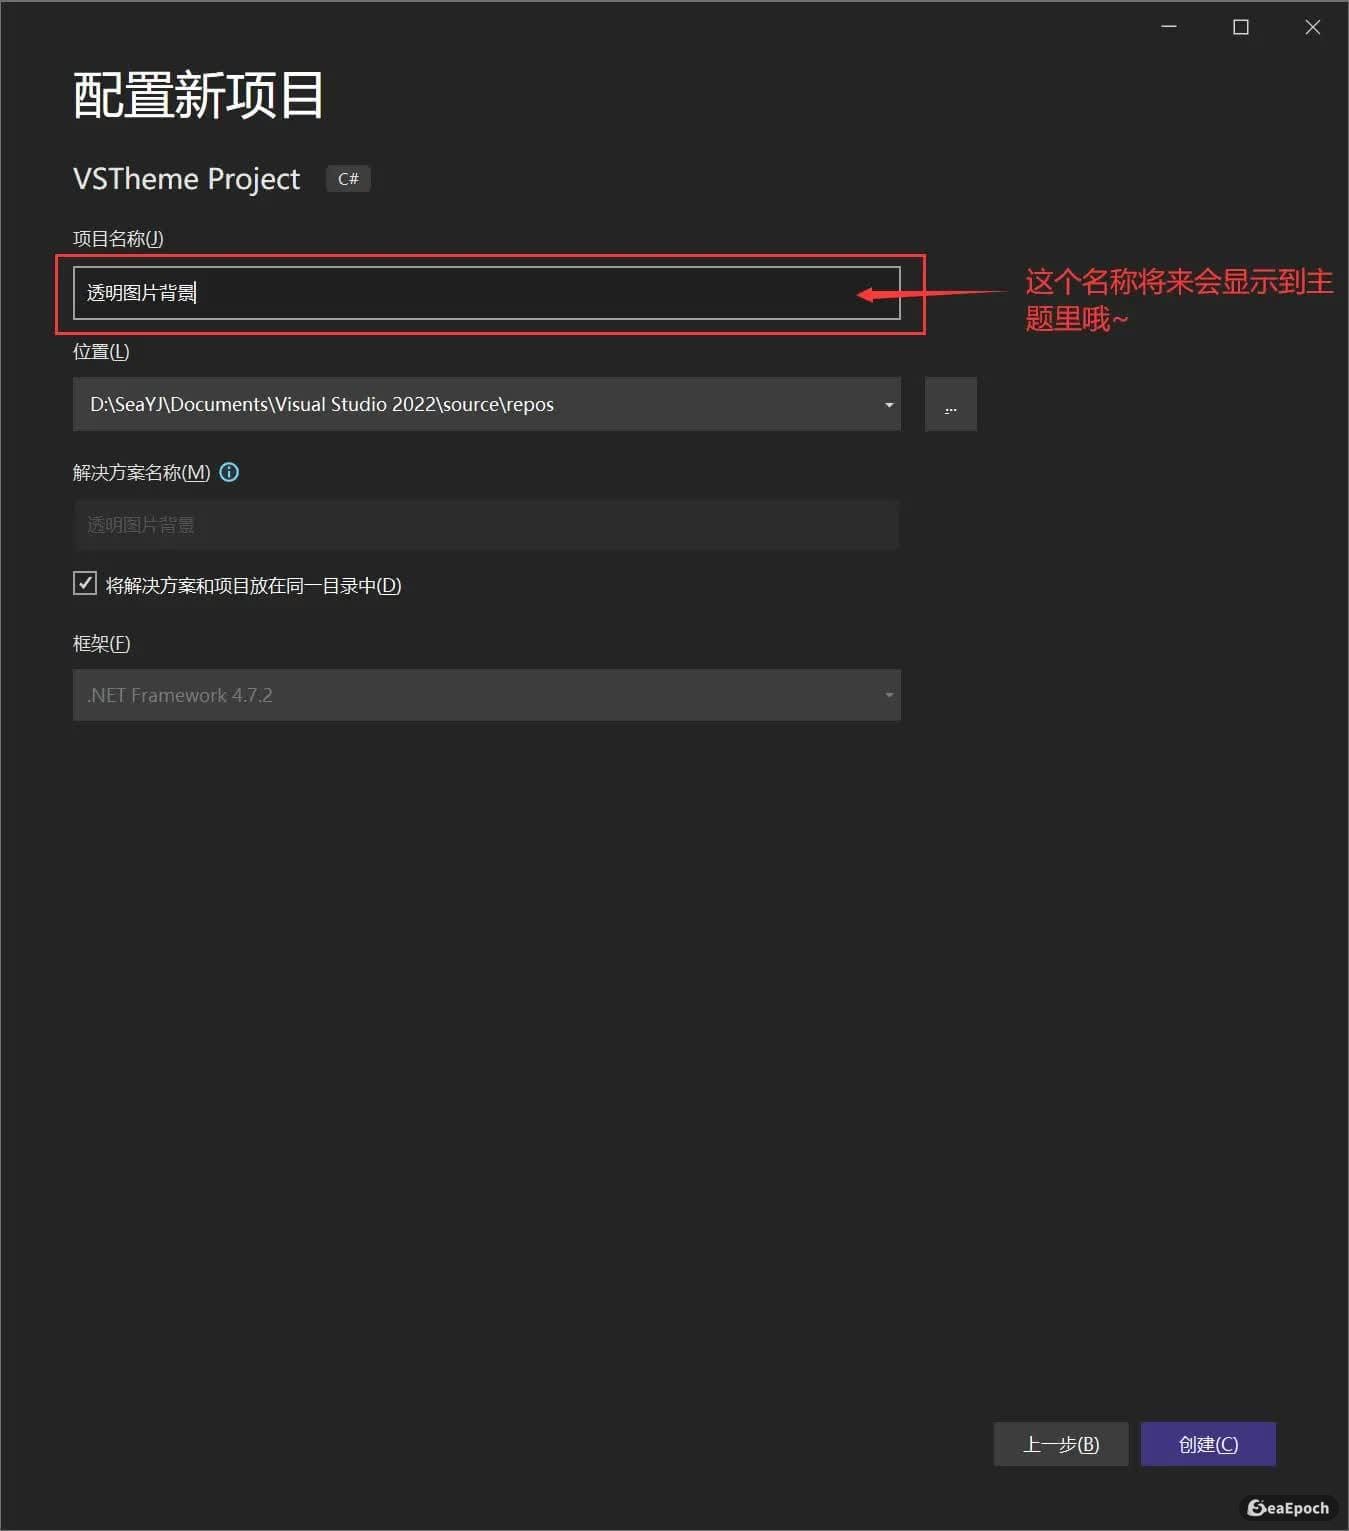
Restart VS 2022, then create a new project so you can preview the interface changes more clearly.


In the theme editor, change the specified properties below to:
2A252526
For VS 2022, some entries expose two color properties. In those cases, only change the darker one. If you change the wrong one, the result will break.
<table> <thead> <tr> <th>1 2 3 4 5 6 7 8 9 10 11 12 13 14 15 16 17 18 19 20 21 22 23 24 25 26 27 28 29 30</th>
<th>TreeView -> Background Environment -> Window Environment -> EnvironmentBackground Environment -> EnvironmentBackgroundGradientBegin Environment -> EnvironmentBackgroundGradientEnd Environment -> EnvironmentBackgroundGradientMiddle1 Environment -> EnvironmentBackgroundGradientMiddle2 Environment -> MainWindowActiveCaption Environment -> MainWindowInactiveCaption Environment -> CommandShelfBackgroundGradientBegin Environment -> CommandShelfBackgroundGradientEnd Environment -> CommandShelfBackgroundGradientMiddle Environment -> CommandShelfHighlightGradientBegin Environment -> CommandShelfHighlightGradientEnd Environment -> CommandShelfHighlightGradientMiddle Environment -> CommandBarGradientBegin Environment -> CommandBarGradientEnd Environment -> CommandBarGradientMiddle Environment -> CommandBarToolBarBorder</th>
</tr>
</thead>
<tbody>
<tr>
<td></td>
<td></td>
</tr>
</tbody>
</table>
These three groups are especially important: only modify the darkest color value in each one.


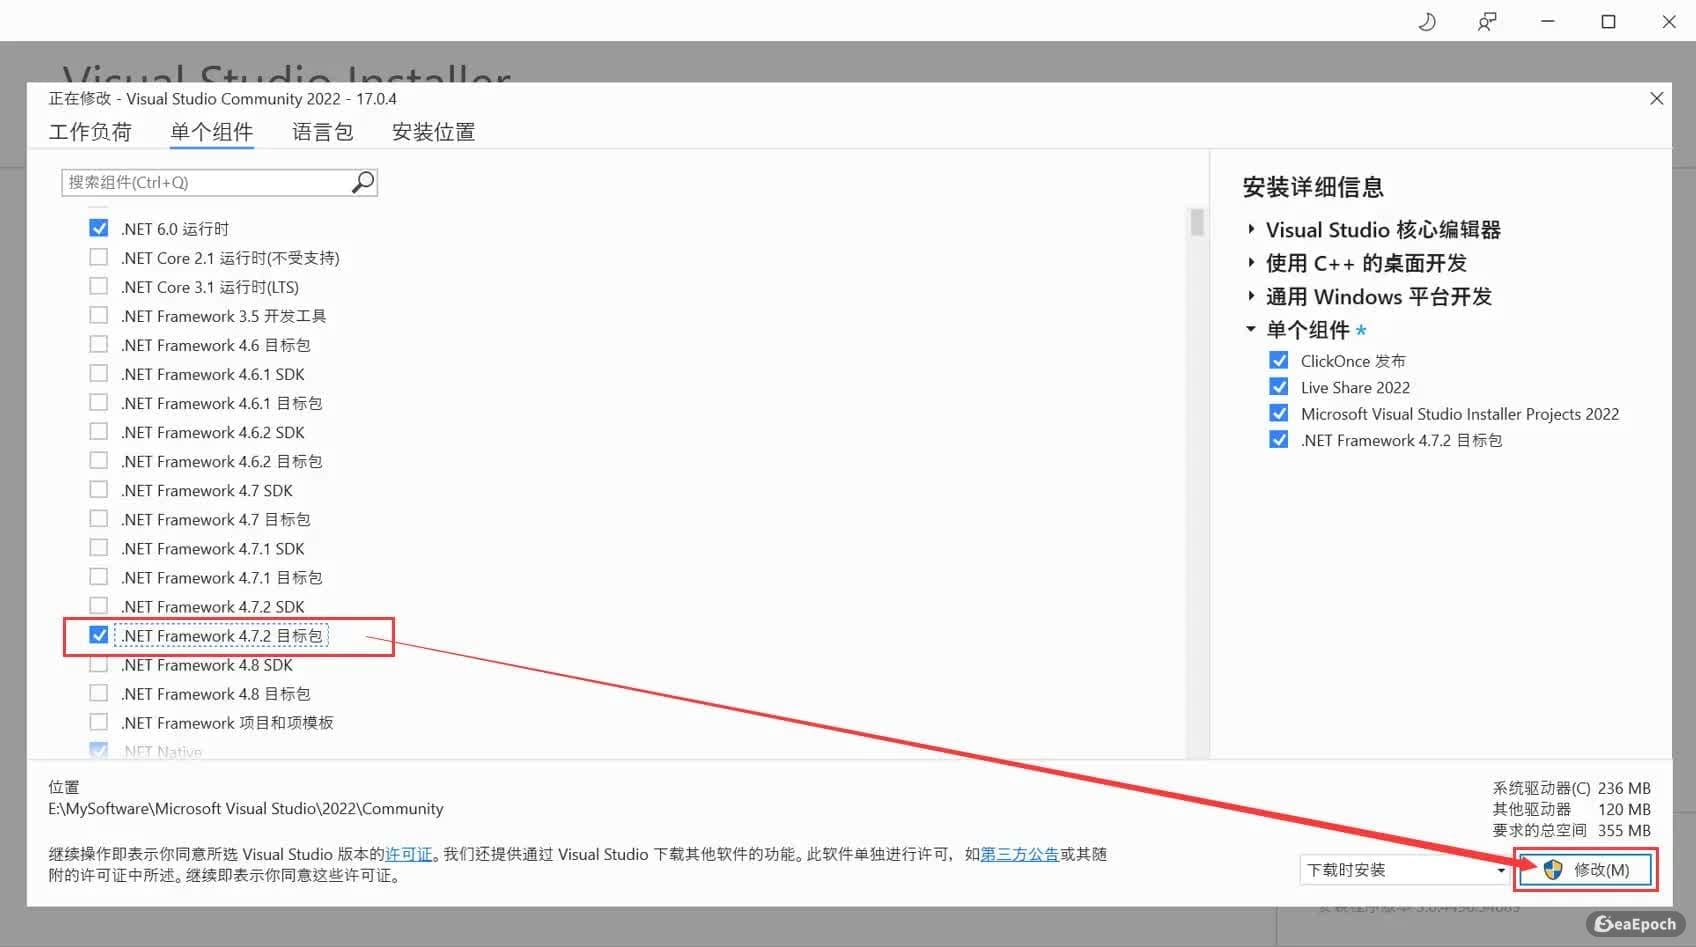
If you run into this issue
If the following error appears, the fix is straightforward:
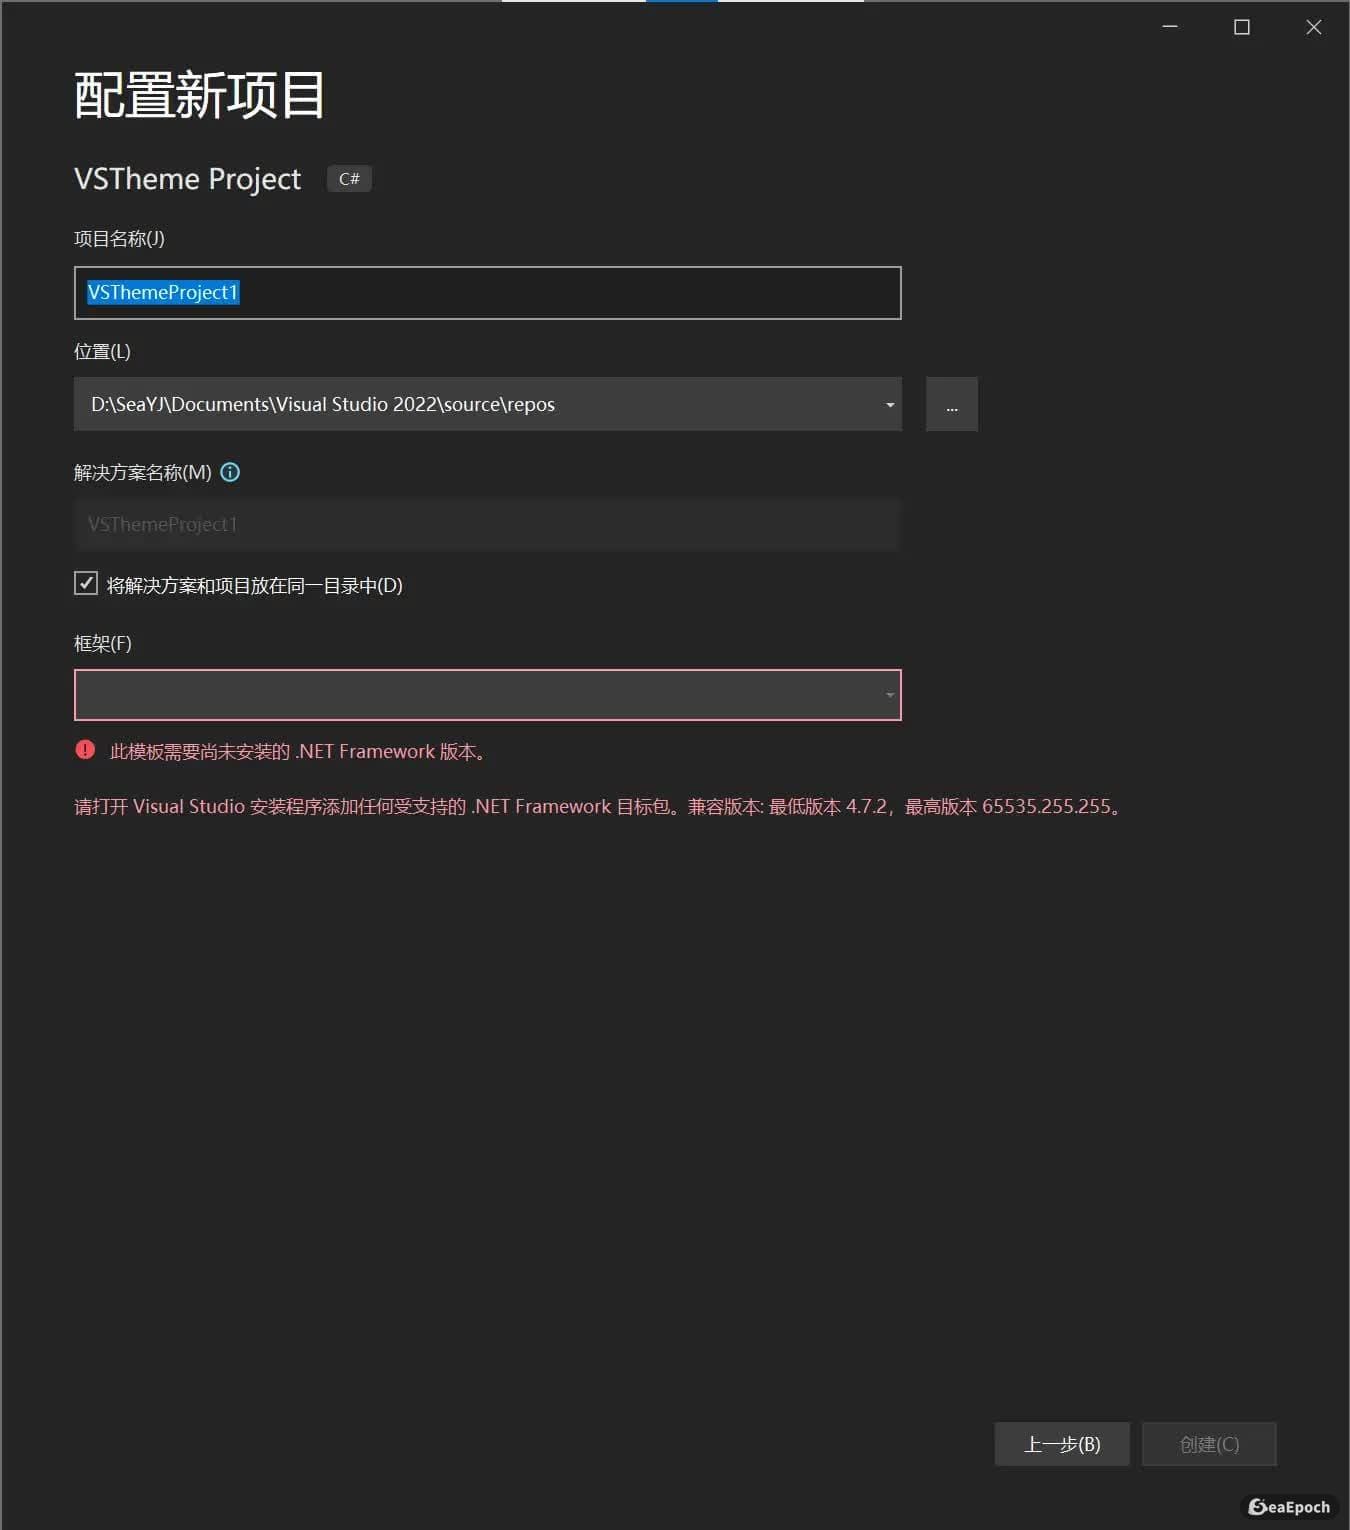
Open Visual Studio Installer, choose Modify, then check the corresponding .NET Framework 4.7.2 targeting pack and apply the change.
Apply the theme
Once the edits are done, click Apply and the transparent background theme should appear immediately.
